Guides / Process
Ceramic Injection Molding: Where the Mould Pays Back and Where It Does Not
October 8, 2026
Ceramic injection molding, usually shortened to CIM, forms small ceramic parts the way plastic parts are formed: powder and binder are heated, pushed into a steel mould and ejected as a solid. Afterwards the binder is removed and the part is sintered. The method can make shapes that pressing or grinding cannot, such as threads, undercuts, thin ribs and curved surfaces, and it can make them by the thousand.
The price of that freedom is a mould, a long debinding step and a minimum volume below which none of it pays back. This guide sets out how the process runs, what the break-even looks like and how to design for it.
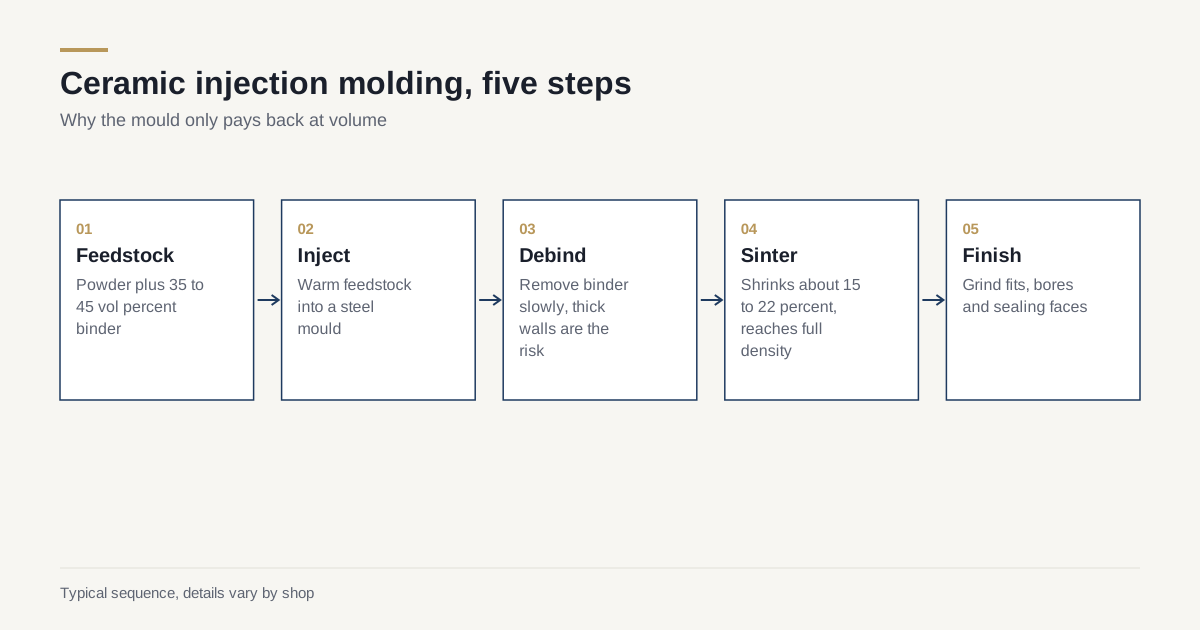
The process in five steps
- Feedstock. Fine ceramic powder is mixed with a polymer binder system. The binder is a large share of the mix, often 35 to 45 percent by volume, because it has to make the powder flow like a plastic.
- Injection. The warm feedstock is injected into a hardened steel mould at modest pressure. The part solidifies as it cools.
- Debinding. The binder has to leave without cracking the part. Routes include solvent extraction, catalytic removal and slow thermal removal. Large cross sections are the problem here, because gas must escape through the thickness.
- Sintering. The debound part, now fragile and porous, is fired. It shrinks by roughly 15 to 22 percent in each direction and reaches full density.
- Finishing. Critical faces are ground, lapped or polished. Everything that must fit something else usually passes through this step.
Where the money goes
| Cost item | One-time or per part | What drives it |
|---|---|---|
| Mould | One-time | Part complexity, number of cavities, mould steel |
| Feedstock development | One-time if new | Powder, binder, part geometry |
| Injection | Per part | Cycle time, cavity count |
| Debinding | Per batch | Wall thickness, binder system |
| Sintering | Per batch | Kiln time, setter use |
| Post-grinding | Per part | Number of ground features |
A mould for a small ceramic part commonly costs in the tens of thousands of dollars, because the cavity must be oversize to allow for shrinkage and made in wear resistant steel. That cost has to be spread over the production run, which is why volume decides everything.
The break-even in plain terms
Compare two routes for the same small part.
- Ground from a blank. No tooling, but every piece needs machine time. Complex features cost more machine time.
- Injection molded. High upfront cost, then a low and stable cost per piece.
For a simple shape such as a short cylinder with a bore, grinding is hard to beat below very large volumes. For a part with a thread, a flange, a cross hole and a small radius, grinding cost per piece may be many times higher, and CIM crosses over at a few thousand pieces. As a first rule, think of several thousand pieces a year as the lower edge, and tens of thousands as the range where CIM is clearly right. Confirm with quotes for both routes.
A related point: because the mould and the process take months to qualify, CIM suits parts with a stable design. If the drawing will change twice before launch, prototype by another route and move to CIM later. For prototypes, see when Macor is the right choice.
Design limits that matter
- Wall thickness. Thin walls of a few tenths of a millimetre are possible. Thick sections beyond roughly 6 to 10 mm are slow to debind and prone to cracks and voids. If your part is thick, ask the shop whether the section can be cored out.
- Even sections. Uniform wall thickness reduces warping and debinding stress. A sudden change from thin to thick is a risk.
- Part size. CIM sweet spot is small parts, usually under about 100 g and often under 20 g. Large parts exist but cost rises steeply.
- Draft and gate marks. The mould needs draft for ejection and leaves a gate vestige that has to be placed on a non-critical face.
- Tolerance. As sintered, expect about ±0.3 to ±0.5 percent of a dimension. A 10 mm feature would then vary by a few hundredths of a millimetre. Tighter features should be ground afterwards.
- Surface. The as-sintered surface is smooth, but not a lapped surface. Sealing and sliding faces need finishing.
Materials that suit CIM
Zirconia is the star for visible and wear parts because it sinters to a dense, tough body that takes a good polish. Watch cases and small wear parts commonly use it. See zirconia grades explained before specifying one.
Alumina covers insulators, ferrules and wear parts at lower cost.
Silicon nitride and silicon carbide are possible but demand more development, and the supplier base is narrow.
Ask for the grade by name and ask which powder and binder system the shop uses, because the property data you rely on belongs to the sintered material and not to the forming route.
A short worked comparison
Picture a small zirconia guide with an outside diameter of 8 mm, a stepped bore, a thread on one end and a flat on the side. Ground from a blank, the thread and the flat each need a separate set-up and a fine diamond tool, and the step in the bore needs an internal grinding pass. On a machine that is already running other work, the part can easily take many minutes of cycle time, and a small share of pieces break during the thread operation.
Molded, the same part comes out of the mould with the thread, the step and the flat already in place. After sintering, only the bore and the end faces are ground. If the shop runs several cavities, the cycle time per piece is a fraction of the ground route. At a few hundred pieces the mould would be hard to justify. At twenty thousand pieces a year the molded part wins by a wide margin, and the margin grows with every added feature.
The lesson is that feature count matters as much as volume. A plain bush or a plain disc never justifies a mould. A part that bundles five features into one piece often does.
What can go wrong
- Debinding defects. Blisters, cracks and slumping from a debinding cycle that was too fast for the section.
- Weld lines. Where two flow fronts meet in the mould, the knit line stays weak after sintering.
- Distortion during sintering. Long flat or thin parts sag on the setter if not supported.
- Lot-to-lot shrinkage change. A new powder lot can shift shrinkage by a fraction of a percent, so the process must be controlled lot by lot.
Quality checks specific to CIM
Because the process has many steps between powder and part, a buyer should expect checks along the way and not only a final dimension report.
- Feedstock lot control. The powder and binder lots are recorded, since a change in either shifts the shrinkage.
- First article from the production mould. The first parts are measured on all critical features and the mould is corrected if needed. A mould is often corrected once or twice after the first sintering trial, because shrinkage is hard to predict exactly.
- Density and visual checks. After sintering, density on a sample and a visual or dye check for cracks and surface voids.
- Dimensional sampling. Key features measured on a sample from each sintering batch, with a record kept by batch.
Ask whether the supplier will share these records for your lot. For general expectations on measurement reports, see how ceramic parts are inspected.
Questions to ask a shop
- How many pieces a year do you need to see before you recommend CIM?
- Who owns the mould, and where is it stored?
- What is the as-sintered tolerance you will guarantee on this feature, and which features will you grind?
- What is the scrap rate on parts of this size?
- What does a design change cost once the mould exists?
Volume decides the route; the guide to buying machined ceramic parts puts the break-even next to minimum orders and prototypes.
If the volumes do not fit, the cheaper route is often a ground part from a pressed blank. See dry pressing vs isostatic pressing for how those blanks are made. When you are ready, send your drawing and volumes through the RFQ page and ask for both routes to be quoted.
Frequently asked questions
How many parts do I need before ceramic injection molding makes sense?
A common rule of thumb is several thousand pieces a year for a small part, though the answer shifts with part size and complexity. The more features you would otherwise have to grind, the lower the break-even point.
What tolerance can ceramic injection molded parts hold?
As sintered, a typical figure is about ±0.3 to ±0.5 percent of a dimension. Tighter features are ground after sintering, which is normal for fits, bores and sealing faces.
Which ceramics can be injection molded?
Alumina and zirconia are the most common. Silicon nitride, silicon carbide and some others are also formed this way, but with a narrower supplier base and longer development.
Need a quote for this part?
Send the drawing. We match you with up to 3 shops that grind this grade and reply within 24 business hours.
Get matched with a ceramic shop