Guides / Process
Finding Cracks in a Ceramic Part Before the Customer Does
October 18, 2026
A crack in a ceramic part rarely announces itself. The material does not bend or stretch first. A flaw that is invisible to the eye can be enough to fail the part under load or thermal shock, and the failure comes without warning. So inspection for cracks is a standard part of making and buying ceramic parts, and the method used decides which cracks you find and which you miss.
This guide sorts the methods by what they actually detect: surface cracks, through-cracks and buried flaws.
Where cracks come from
Knowing the origin helps choose the method.
- Forming. Lamination and pressing cracks, sometimes hidden until firing.
- Firing. Cooling too fast or uneven support causes cracks that are often visible only after grinding.
- Grinding. Wheel pressure and heat create fine surface cracks and subsurface damage, usually shallow but enough to cut strength.
- Handling and shipping. Chips and edge cracks from knocks.
- Service. Thermal shock and stress cycles. For causes and cures, see why did my ceramic part crack.
Method 1: visual check with magnification
The simplest method is also the first to use. Clean the part. Look at it under bright raking light and a 10 times loupe or a stereo microscope. Rotate it, so light skims across each face.
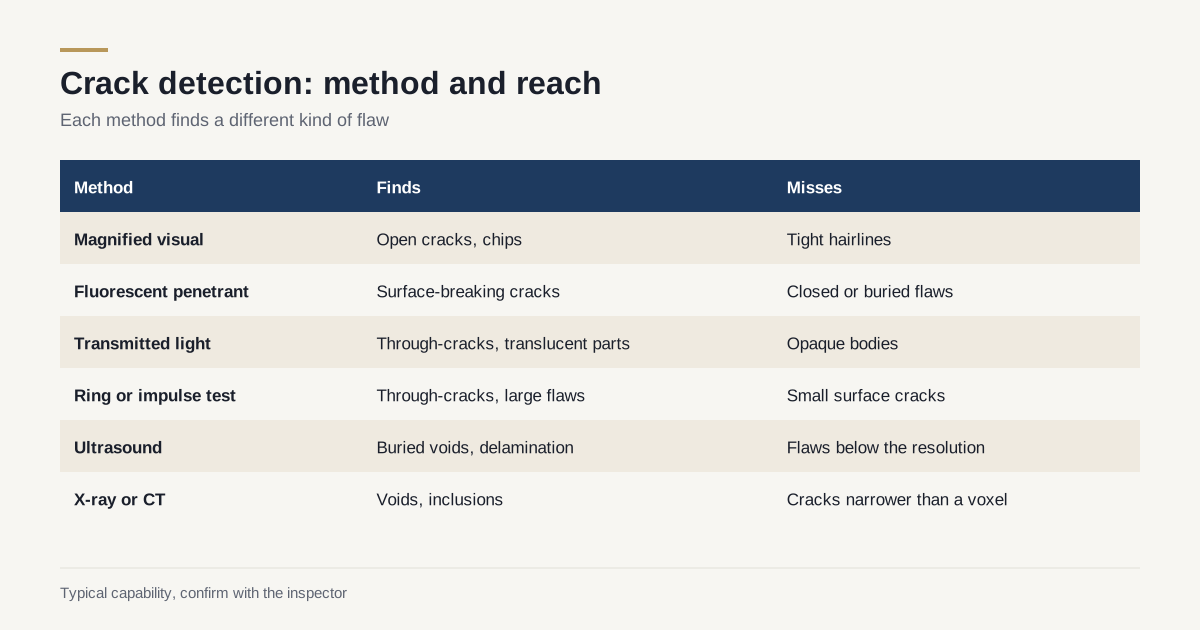
- Finds: Open cracks, chips, large pits, visible edge damage.
- Misses: Tight hairlines, cracks closed by compression and anything under the surface.
- Good for: Everything, as a first pass.
White and translucent parts show more detail than dark ones. Ground surfaces scatter light and hide fine cracks that would show on a polished face.
Method 2: dye and fluorescent penetrant
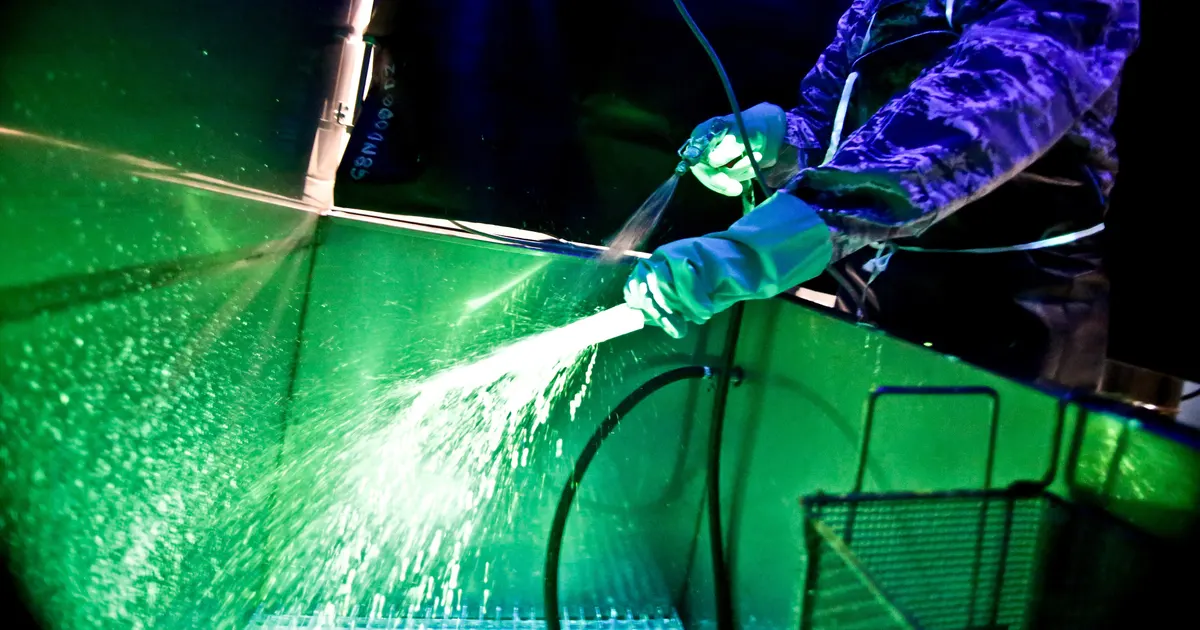
A liquid with low surface tension is applied to the cleaned surface. It runs into any crack that reaches the surface. After a set dwell time the surface is wiped, a developer is applied and the liquid bleeds back out and marks the crack. With fluorescent penetrant, the crack glows under ultraviolet light, which shows finer flaws than a coloured dye.
- Finds: Surface-breaking cracks, pinholes, open porosity.
- Misses: Closed cracks, subsurface flaws and anything on a porous body that soaks up the liquid.
- Watch: Penetrant can stay in pores and cracks after cleaning. Check that the part can tolerate residue, for example in vacuum or medical work. Cleaning steps and approval should be agreed in advance.
This is the same method used on metals. For the full range of checks on a finished part, see how ceramic parts are inspected.
Method 3: transmitted light
A translucent part, such as thin alumina or a glass ceramic, can be lit from behind. A crack scatters the light and shows as a bright or dark line. With a polarised filter the strain around a flaw can show too.
- Finds: Through-cracks and some internal flaws in translucent bodies.
- Misses: Opaque bodies, which is most of them.
- Good for: Thin plates, windows and tubes in translucent grades.
Method 4: sound and resonance
A ceramic part has its own natural frequencies. A crack lowers the stiffness, which lowers the frequency and damps the ring.
-
Tap or ring test. Hold the part loosely and tap it with a light plastic hammer. A sound part rings clear and long. A cracked part sounds dull.
-
Impulse excitation. A small hammer excites the part and a microphone records the frequency and damping. Comparing a part with a known good one detects cracks and large flaws objectively. The same technique is used to measure elastic modulus on test bars.
-
Finds: Through-cracks and large internal flaws that change stiffness.
-
Misses: Small surface cracks that leave the stiffness almost unchanged.
-
Good for: Screening many identical parts quickly. A reference part and a pass band make it a pass-fail test.
Method 5: ultrasound
High frequency sound is sent through the part and the echoes are read. A crack or void reflects the wave. In a water bath, a transducer can scan across a plate and build a map, called a C-scan. Scanning acoustic microscopy uses much higher frequencies and finds very small flaws near the surface or at bonded interfaces.
- Finds: Cracks, delaminations, voids and bond defects, including buried ones.
- Misses: Cracks aligned parallel to the beam and flaws smaller than the resolution.
- Cost: Higher, and needs shapes that the beam can cover, such as plates, discs and tubes.
Method 6: X-ray and CT
Radiography shows density differences. Computed tomography builds a 3D model, so a crack, void or inclusion appears as a volume.
- Finds: Voids, inclusions, large cracks and internal geometry.
- Misses: Very fine tight cracks that are narrower than the voxel size.
- Cost: The highest of the six, so it suits high-value or qualification work.
Which method for which flaw
| Flaw | First choice | Backup |
|---|---|---|
| Surface hairline | Fluorescent penetrant | Magnified visual |
| Edge chip | Magnified visual | Penetrant |
| Through-crack in a simple shape | Ring or impulse test | Penetrant |
| Buried void or lamination | Ultrasound | CT |
| Bond defect in a brazed or bonded joint | Ultrasound | X-ray |
| Many identical parts to screen | Impulse test | Visual sample |
Sequence matters
The order of checks changes what you find.
- Clean first. Oil, grinding slurry and fingerprints fill cracks and block penetrant. Ultrasonic cleaning and a dry-out step come before any dye.
- Look before you dye. Visual inspection under raking light is free and may already reject the part.
- Penetrant before any coating or glaze. Once a layer covers the surface, the crack is hidden.
- Penetrant after final grinding, not before. Grinding can open or close surface cracks. A part checked before grinding is not proven good afterwards.
- Stress screens last. Proof loading or thermal cycling can propagate a flaw, so run the non-destructive checks first and the proof test after.
What a reasonable acceptance rule looks like
A rule that a shop can follow and a buyer can verify has three parts: where, how large and how found. Examples in plain words:
- “No linear indication longer than 0.5 mm on the sealing face under fluorescent penetrant.”
- “No chip larger than 0.2 mm at any edge, measured under 20 times magnification.”
- “Resonance frequency within a stated band of the reference part, with no secondary peaks.”
Numbers like these are typical in kind, not a standard. Set them from the function of the part. A decorative face can tolerate more than a sealing face. An unloaded insulator tolerates more than a plunger under load.
Why a clean report does not mean the part is crack free
Every method has a detection limit. A penetrant test misses a crack that is closed tight, an ultrasonic scan misses a flaw smaller than its beam and a ring test misses a crack that barely changes stiffness. A clean result means no flaw was found above the limit of that method. For critical parts, two methods that work differently give a stronger answer than one repeated.
How to write it into an RFQ
Name the flaw you worry about and the method you accept, with an acceptance limit. “No cracks visible at 10 times magnification” and “no penetrant indication on functional faces” are different requirements with different costs. Ask for a record: who tested, which method, which standard, which lot.
Do not ask for CT on every part unless the risk justifies it. Most ceramic work is well covered by a visual inspection plus penetrant on a sample, with impulse screening on repeat parts.
Checklist
- Say which faces are critical and where cracks are not allowed.
- Choose a method that matches the flaw type.
- Agree cleaning and residue limits before penetrant.
- Define pass and fail in writing, with an image or a limit sample.
- Ask for test records with the shipment.
To find shops that run these checks on ground parts, send your drawing and the inspection requirement through the RFQ page.
Frequently asked questions
Can a hairline crack in a ceramic part be seen by eye?
Sometimes, under good raking light and 10 times magnification. Many hairlines are invisible until a dye penetrant or fluorescent penetrant fills them. Dark parts and ground surfaces hide cracks better than white, polished ones.
Does the ring test really work?
It works as a quick screen for through-cracks in simple shapes. A sound part rings with a clear tone and a cracked part sounds dull. It is not a measurement and it misses small surface cracks, so use it as a first filter and not as the acceptance test.
Which method finds cracks inside the part?
Ultrasonic scanning and X-ray or CT imaging look inside the body. Penetrant and light methods only show flaws that reach the surface.
Need a quote for this part?
Send the drawing. We match you with up to 3 shops that grind this grade and reply within 24 business hours.
Get matched with a ceramic shop